This post will give you a gist of the gamemode and how to get started.
Premise
- You play a character in the Half-Life 2 Universe, where the Universal Union (Combine) conquered Earth in the Seven Hour War.
- Universal Union/Combine is a brutal regime that intentionally keeps citizens malnourished to maintain ironclad control over the population.
- F4 menu has jobs/factions that can be joined. Some have XP requirements. XP is gained by playtime.
- Citizen
- Civil Workers Union
- Civil Protection
- Overwatch Transhuman Arm (OTA)
- City Administrator
- Vortigaunt
Currency
- As any class, you have currency, which can be seen on your HUD.
- Tokens on your body will drop when you die as loot.
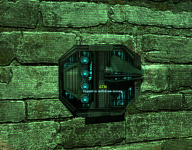
- Deposit Tokens in an ATM (located on walls and labeled ATM) to prevent them from being dropped as loot.
- Currency can be traded with commands. Do
/dropmoney <amount>to drop a certain amount on the ground that anyone can pick up.
Items/Inventory
- Inventory can be accessed with C (or the crouch button configured).
- Clothing/armor can be equipped.
- Weapons can be equipped for use.
- If a weapon is not showing when you scroll, it likely needs to be equipped in your inventory menu.
- Similar to Currency, items in your player inventory are dropped as loot upon death. However, you can store any items you want to save in Storage.
Citizens
- Build, make a base, make a shop, rebel, mess around, try not to get arrested!
- May be a loyalist (help Combine) or rebel (harbor or participate in illegal activities per the Universal Union law)
- Create/join groups/organizations (F6)
Rebels (Anti-Citizens/Resistance)
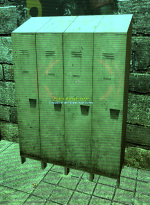
- Citizens may become a rebel anti-citizen by harboring or committing illegal activities. Most easy way to become a rebel is to put on rebel clothing from a Rebel Locker, found in restricted areas.
- Rebels are considered members of the Resistance.
- To get started, try to get past the Civil Protection team patrols in the restricted construction zones.
- Once past the sewer entrance, Civil Protection can only follow for a brief time before you are now safe from them, unless a Judgement Waiver or Autonomous Judgement happen, where they will sweep all restricted areas.
- Look for lootable containers throughout restricted zones, which may be garbage bins, lockers, trash cans, cabinets, and more. Click
Eon these entities when found to loot. They will automatically regenerate their loot over time. Some have specific loot types they generate. - Use the loot to craft weapons, armor, and other items to fight against the Combine. Click the F4 menu and under Business, purchase a General Workbench and/or Weaponry Workbench for your needs. Be sure not to craft in front of the Combine!
- Be careful with any illegal contraband/items/weapons crafted when walking around the city, you might be searched if suspected!
- Purchase items from the Black Market Dealer who travels around the map in various restricted zones. After a while, you'll become familiar with where he appears.
- Coordinate rebel attacks on protection & overwatch outposts, patrols, and city locations.
- Only exception is the Nexus/plaza, which staff permission (use F3) must be obtained before attacking.
- Build rebel outposts and bases. Often rebels base with their group members. Infighting among rebels may happen and bases may have Building, KOS signs, and so forth.
Civil Workers Union
- Citizens may get legal jobs and receive compensation via the Civil Workers Union (F4 job).
Laundry
- Across from the Ration Distribution Center is a door to the right labeled Civil Workers Union, here laundry work can be performed by CIvil Workers Union members for tokens
- Enter and be sure to lock the door behind you to avoid having citizens bother your work
- You may need to use keys and right-click to unlock
- Find a laundry station & click E on the dispenser
- To be added: screenshot here
- With Hands, right-click on the laundry to pick it up
- Place the laundry inside the washing machine, once in the right place it will begin spinning
- To be added: screenshot here
- Wait for laundry to be washed. Once complete, it will be placed in front of the washing machine labeled as clean. Pick it up
- To be added: screenshot here
- Bring it over to the Laundry Basket and place it inside. Can place several before clicking E on the laundry basket to get your tokens for your laundry completed
Refilling Vending Machines
To be completed...Civil Protection
Selecting Division & Rank
- Once Civil Protection has been selected as a faction, you may notice your character still has its citizen name. It is not currently an active unit, until your division and rank are selected.
- Go to the Nexus Lobby or Ration Distribution Center.
- Use your keys and right-click on the sliding Combine door.
- If in the Lobby, choose the one on the left and go up the stairs on the left.
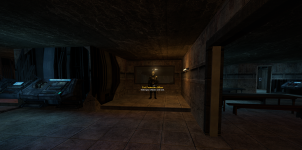
- Go toward the right/back, where and open area has the Civil Protection Officer you can select division and rank at. Press E on it.
- Select your desired division and rank. Each division serves a different purpose and may have a different loadout, described in the interface. Certain divisions/ranks will only be accessible once enough XP has been obtained or once the player has been whitelisted.
- Once selected, your name will change to the proper protection team format.
- Use your radio -
/radio
Arming/Armory
Starting after Selecting Division and Rank:- Open your inventory with C and click on each of the items given (e.g., Stunstick, Pistol) and click "Equip."
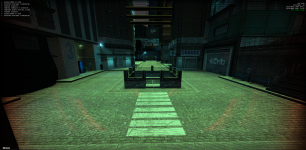
- Navigate to the Civil Protection Requisition Supply Officer by heading toward the Nexus plaza.
- Once at the plaza, if the central elevator is not available or already coming up, use the command
/plazaelevatorto remotely call it. - Take the elevator down to the Civil Protection level.
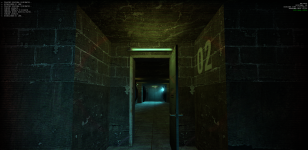
- Go through the door labeled on the wall as "02" - be sure to relock any doors you unlock in case a citizen gets in.
- Go down the hallway toward the double doors and enter.
- See the supply officer in the vendor window and click E on it.
- Click on desired supplies. Availability will change based on division, rank, and city status.
- To use your radio -
/radio
Gameplay
- Respond to rebel attacks and quash resistance.
- Keep law and order, detains suspected players for questioning. If a crime is committed, arrest via:
- Use FearRP to place the player against the wall
- Open your inventory (hold C) while looking at the player
- Under Zip Tie, click and "Tie"
- Once the player is tied, HUD will indicate controls to grab the player and you can walk around with them restrained
- To bring in for questioning, keep restrained and bring to JURY. Ask over radio for help locating JURY on the map.
- To arrest/detain for violating UU law, drag to a Combine Terminal, press E, then select the arrest reason. Once completed through the terminal, player will be teleported to the Combine jail on the map, where JURY reside.
- Watch HUD (Combine Helmet Overlay) for command, way, or request points. Also watch and respond to any biosignal losses, given they are not in an area you cannot go. If it is a base in an area Protection teams can patrol, may raid.
- To be completed...
Overwatch (OTA)
Elite units of the Universal Union. Fully brainwashed and biological hybrids with Combine technology, enhancing their strength, endurance, and intelligence.Selecting Division & Rank
- Once Overwatch has been selected as a faction, you may notice your character still has its citizen name. It is not currently an active unit, until your division and rank are selected.
- Go to the Nexus Lobby or Ration Distribution Center.
- Open the door to the right using Keys and right-click.
- Don't worry about relocking Nexus doors that slide, only worry about relocking other types of doors
- Go to the right down the hall and into the Nexus elevator area past the gate.
- Click E on the keypad to activate the elevator.
- Continue to the next elevator and once it has reached the next level, go to the side across from where you entered.
- Open the Overwatch Armory door using Keys and right-click.
- Go into the area where there's the Overwatch Transhuman Arm Officer you can select division and rank at. Press E on it.
- Select your desired division and rank. Each division serves a different purpose and may have a different loadout, described in the interface. Certain divisions/ranks will only be accessible once enough XP has been obtained or once the player has been whitelisted.
- Once selected, your name will change to the proper protection team format.
Arming/Armory
Starting after Selecting Division & Rank- Press E on the Overwatch Requisitions Officer.
- Click on desired supplies. Availability will change based on division, rank, and city status.
Catwalks
- Enter the sliding door inside the armory and go down the hallway.
- Open the door to the catwalks.
- May patrol along the Nexus catwalks (ones alongside the building) and plaza catwalks.
- The empty two-story building accessible via the plaza catwalks is considered an Overwatch/Protection team outpost that can be used at any city status code level. May build there.
Gameplay
- Use your radio -
/radio - Watch HUD (Combine Helmet Overlay) for command, way, or request points. Also watch and respond to any biosignal losses, given they are not in an area you cannot go. If it is a base in an area Overwatch teams can patrol, may raid.
SENTINEL
- Guard and protect the City Administrator at all costs.
- Put yourself in-between the line of fire of anyone attacking the City Administrator.
- Eliminate any threats to the City Administrator. If another Protection or Overwatch team member attacks the CA and it has not been ordered by a Command unit (OfC, DvL, CmD, SeC), eliminate the unit.
- A City Administrator might be deemed mentally unfit by a Command unit or if none online, consensus of the Protection/Overwatch teams. In this case, the CA is to be amputated (eliminated). SENTINELs should ignore all previous protection routines and eliminate the CA upon receiving this order.
- May build defenses in the Nexus, such as in the City Administrator's office.
ECHO
- Guard around the Nexus, including the lobby.
- If citizens get unruly in the lobby, detain or eliminate after warning.
- May build defenses around the Nexus.
- Eliminate any rebels seen.
- Detain citizens (see Civil Protection for how to arrest) or eliminate if they run for more than the rules allow.
- During Judgement Waiver, follow Command unit orders and deploy from the Nexus, sweeping all areas of the map known--including restricted areas.
- Conduct raids on apartments per Command unit orders or as needed for rebels discovered by Protection teams
MACE
- Same as ECHO unit except technically one higher in command.
- Closer-range unit with shotgun.
RANGER
- Same as ECHO unit.
- Longer-range unit with sniper.
City Administrator (CA)
- Stay in the City Administrator's office or walk around the Nexus on occasion.
- Visit the Nexus lobby on occasion.
- During Civil city status, stroll around the city or attend/host events on occasion.
- Be aware of the rules requiring certain amounts of SENTINEL units be with you.
- Follow orders from any Command units or if none online, consensus of the Protection/Overwatch teams.
- Occasionally invite guests to the City Administrator's office. Make sure they are searched by a Protection/Overwatch team member beforehand.
Accessing City Administrator's Office
Starting after Overwatch: Selecting Division & Rank, except continue on the second floor to the side you entered from.- Follow the ramps to the next level.
- Go up the next elevator, facing toward the interior of the Nexus.
- Go up the final elevator to the City Administrator's office.
- Wait for Overwatch (or ask over radio) to extend the bridge and lower the shield, if needed.
- Go across the bridge and feel free to build and make the City Administrator's office home.
Vortigaunt
- Similar to citizen, can do what they want and be loyalist or anti-citizen rebel.
- Can request to work for the Universal Union to a Protection/Overwatch team member. Upon approval, can clean areas of the Nexus or public.
- Can work with rebels and get Vortessence, allowing them to attack.
- Can use Vortessence to attack Protection/Overwatch team members and outposts, per the same rules as the Rebels.
Last edited:


